
Roblox MCP Bridge
MCP server that enables AI agents to interact with a running Roblox game client, including code execution, script inspection, remote spying, and GUI automation.
README
<p align="center"> <img src="docs/banner.svg" alt="Roblox Executor MCP" width="900"/> </p>
Roblox MCP Bridge
An MCP server that allows Agents to interact with a running Roblox game client — execute code, inspect scripts, spy on remotes, and more.
This repository is a maintained mirror of the original
notpoiu/roblox-executor-mcpproject. The original Git history and MIT license are preserved.
Dashboard
Roblox Executor MCP includes a local web dashboard at:
http://localhost:16384/
Use it to see connected Roblox clients, inspect scripts, run tools, view server logs, configure semantic search, and index games for semantic script search.
Features
- Code Execution — Run Lua code and fetch data from the game client.
- Script Inspection — Decompile scripts and search across all sources.
- Instance Search — CSS-like selectors and hierarchy trees.
- Remote Spy — Intercept, log, block, and ignore Remotes/Bindables via Cobalt.
- GUI Interaction — Click buttons and type into text boxes.
- Screenshot — Capture Roblox window screenshots (Windows only).
- Multi-Client — Connect multiple Roblox clients at once.
- Primary / Secondary — Multiple MCP instances auto-coordinate with automatic promotion. Supports remote relaying via
--baseurl. See Advanced.
Tutorial
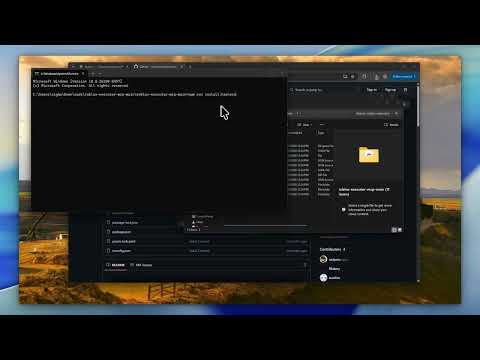
Prerequisites
- Git for cloning and updating the repository
- Node.js ≥ 18
- Bun ≥ 1.3 for the interactive OpenTUI harness installer
- A Roblox executor that supports
loadstring,request, and (preferably)WebSocket
Installation
1. Install Git on Windows
If PowerShell says git is not recognized, install Git first:
winget install --id Git.Git -e --source winget
Close every PowerShell window, open a new one, and verify the installation:
git --version
If winget is unavailable, download Git from git-scm.com/download/win, install it, and reopen PowerShell. Do not run the clone command until git --version works.
2. Clone the server
Set-Location $env:USERPROFILE
git clone https://github.com/ltseverydayyou/roblox-mcp-bridge.git
Set-Location .\roblox-mcp-bridge
If cloning fails, the roblox-mcp-bridge folder is not created, so the following Set-Location/cd command will also fail. Fix the clone error first.
3. Run the harness installer
The installer builds the server, lets you choose AI clients, writes supported MCP configs, and prints the Roblox loader script.
npm run install:harnesses
This command installs dependencies, builds dist/index.js, lets you select supported AI clients, and writes their local MCP configuration. Bun is installed automatically if the interactive installer needs it.
The picker is built with OpenTUI and runs through Bun. npm run install:harnesses installs Bun first if it is not already available. It shows detected local clients by default; if none are detected, it warns you to install a harness first. Press s in the picker or pass --show-all-harnesses to reveal every supported config target. If your terminal has trouble with the interactive picker, use the plain numbered prompt:
npm run install:harnesses -- --plain
The installer can also place the Roblox loader into a detected executor autoexec folder, such as MacSploit on macOS or supported Windows executor autoexec folders. Use the prompt, or run:
npm run getscript -- --autoexec
It can also help with:
- cross-machine setup on the same LAN
- copying the Roblox loader to your clipboard
- optional Ollama
embeddinggemmasetup for semantic indexing - pulling latest repo changes before install/build
To update an existing install later, run:
npm run update
The update command can stop currently running MCP server processes, optionally pull latest changes, and always rebuilds the server.
Manual setup
To install and build without the interactive installer:
npm install
npm run build
If you prefer to configure a client yourself, use the setup guide for your client:
| Client | Guide |
|---|---|
| Cursor | Setup Guide |
| Claude Desktop | Setup Guide |
| Claude Code | Setup Guide |
| Codex CLI | Setup Guide |
| Windsurf | Setup Guide |
| Antigravity | Setup Guide |
4. Connect from Roblox
The installer prints this for you. Put it in your executor or Auto Execute:
local bridgeUrl = getgenv().BridgeURL or "localhost:16384"
loadstring(game:HttpGet("http://" .. bridgeUrl .. "/script.luau"))()
Optional settings (set before the loadstring):
getgenv().BridgeURL = "10.0.0.4:16384"                  -- default: localhost:16384
getgenv().DisableWebSocket = true                        -- force HTTP polling
getgenv().DisableInitialScriptDecompMapping = true       -- skip initial decompilation
After the MCP server starts and Roblox connects, open the dashboard:
http://localhost:16384/
Remote access and ChatGPT plugins
This project currently exposes MCP over local stdio. Port 16384 is the unauthenticated Roblox bridge and dashboard, not a remote MCP endpoint. Do not point a public tunnel at that port.
- For another computer on the same trusted network, use a VPN, LAN address, or SSH tunnel as described in Advanced Configuration.
- For ChatGPT, OpenAI's
tunnel-clientcan launch this localstdioMCP server and carry MCP traffic over an outbound-only tunnel without publicly exposing port16384. - For a direct remote MCP URL, place an authenticated Streamable HTTP MCP gateway in front of the local server and keep bearer tokens in environment variables. Public authenticated plugins should use the supported MCP OAuth 2.1 flow.
See OpenAI remote MCP and plugin connections for architecture, tunnel, authentication, and configuration examples.
Windows users can download and checksum-verify the latest official OpenAI tunnel client from the repository root:
powershell -NoProfile -ExecutionPolicy Bypass -File .\scripts\install-tunnel-client.ps1
For the complete first-time setup—project build, autoexec installer, official tunnel-client download, profile creation, secure runtime-key prompt, diagnostics, and startup—run:
powershell -NoProfile -ExecutionPolicy Bypass -File .\scripts\setup-chatgpt-tunnel.ps1
After restarting Windows, start the saved profile with:
powershell -NoProfile -ExecutionPolicy Bypass -File .\scripts\start-chatgpt-tunnel.ps1
See the complete Windows and ChatGPT tunnel setup for the Roblox, ChatGPT, restart, and troubleshooting steps.
Community
Have a suggestion or need help? Join the Discord server.
Security
This server allows arbitrary code execution. Only use with AI clients you trust. Port
16384has no authentication — never expose it to the internet. For cross-machine setups, use a local network, VPN, or SSH tunnel. See Advanced for details.
License
推荐服务器

Baidu Map
百度地图核心API现已全面兼容MCP协议,是国内首家兼容MCP协议的地图服务商。

Playwright MCP Server
一个模型上下文协议服务器,它使大型语言模型能够通过结构化的可访问性快照与网页进行交互,而无需视觉模型或屏幕截图。

Magic Component Platform (MCP)
一个由人工智能驱动的工具,可以从自然语言描述生成现代化的用户界面组件,并与流行的集成开发环境(IDE)集成,从而简化用户界面开发流程。

Audiense Insights MCP Server
通过模型上下文协议启用与 Audiense Insights 账户的交互,从而促进营销洞察和受众数据的提取和分析,包括人口统计信息、行为和影响者互动。

VeyraX
一个单一的 MCP 工具,连接你所有喜爱的工具:Gmail、日历以及其他 40 多个工具。

graphlit-mcp-server
模型上下文协议 (MCP) 服务器实现了 MCP 客户端与 Graphlit 服务之间的集成。 除了网络爬取之外,还可以将任何内容(从 Slack 到 Gmail 再到播客订阅源)导入到 Graphlit 项目中,然后从 MCP 客户端检索相关内容。

Kagi MCP Server
一个 MCP 服务器,集成了 Kagi 搜索功能和 Claude AI,使 Claude 能够在回答需要最新信息的问题时执行实时网络搜索。

e2b-mcp-server
使用 MCP 通过 e2b 运行代码。

Neon MCP Server
用于与 Neon 管理 API 和数据库交互的 MCP 服务器

Exa MCP Server
模型上下文协议(MCP)服务器允许像 Claude 这样的 AI 助手使用 Exa AI 搜索 API 进行网络搜索。这种设置允许 AI 模型以安全和受控的方式获取实时的网络信息。